G-Web/Setup
G-Web/Setup makes it possible to create multiple G-Core/GeViScope server connections and Custom buttons that are used by the G-Web service.
G-Web/Setup can ONLY be accessed on the machine on which the G-Web service is running by opening the URL http://localhost:13080 with any browser.
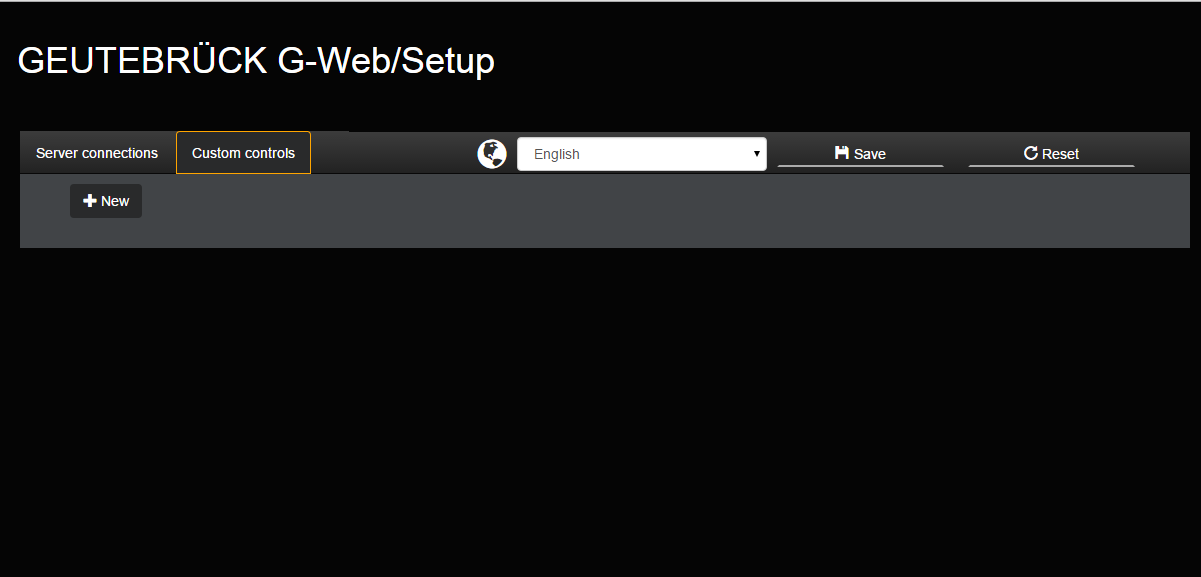
In the menu bar, there are two tabs: Server connections for the connection list and Custom controls for creating customized buttons. A drop-down field for the language setting and the buttons for Save and Reset complete the menu.
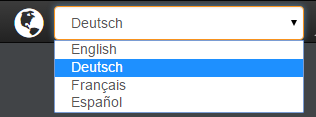
Language Selection
Using the drop-down field, the display language can be set to German, English, Spanish or French. The language change takes place dynamically and is stored permanently in the corresponding browser.
Creating Server Connections
Using the Server connections tab, the New key can be used to create input fields for configuring a G-Core/GeViScope connection. The number of connections depends on your system, network and number of cameras / servers. For each connection created using the New key, two input fields, one drop-down menu for the server selection and one button for deletion are provided.
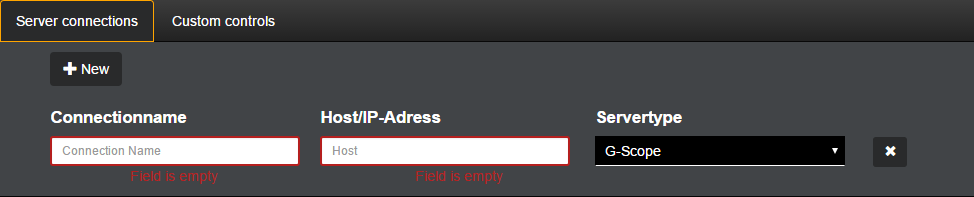
If nothing is entered in the input fields, they are outlined red and an error message is displayed below and the Save key is grayed out and deactivated.
A Connection name is entered in the first input field. The name should be clear and unique and able to be associated with the G-Core/GeViScope server.
In the second field a host/IP address, such as localhost, or the IP address of the G-Core(GSC) server is entered.


In the third field, the server type (G-Scope or GeViScope/re_porter) can be set using a drop-down menu.

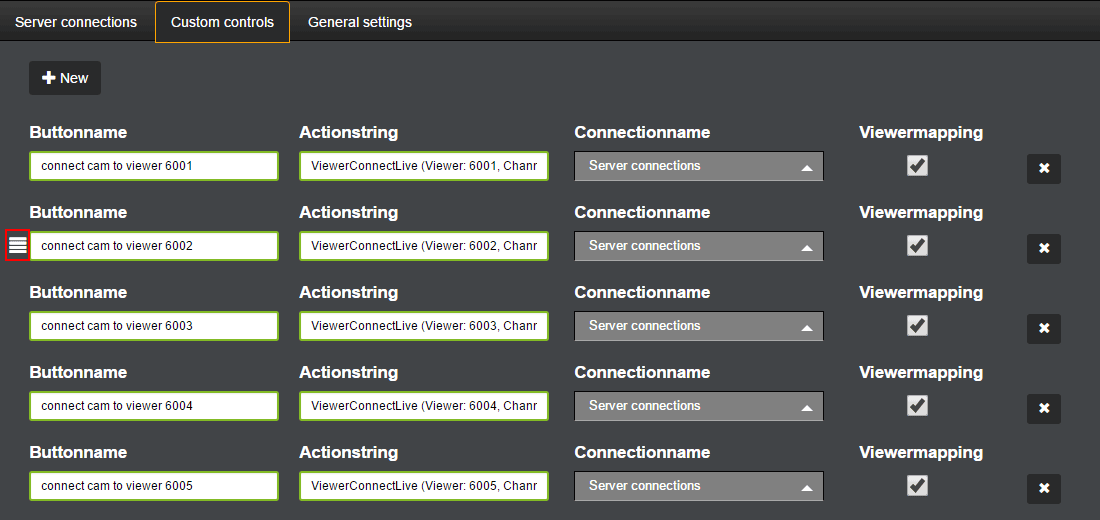
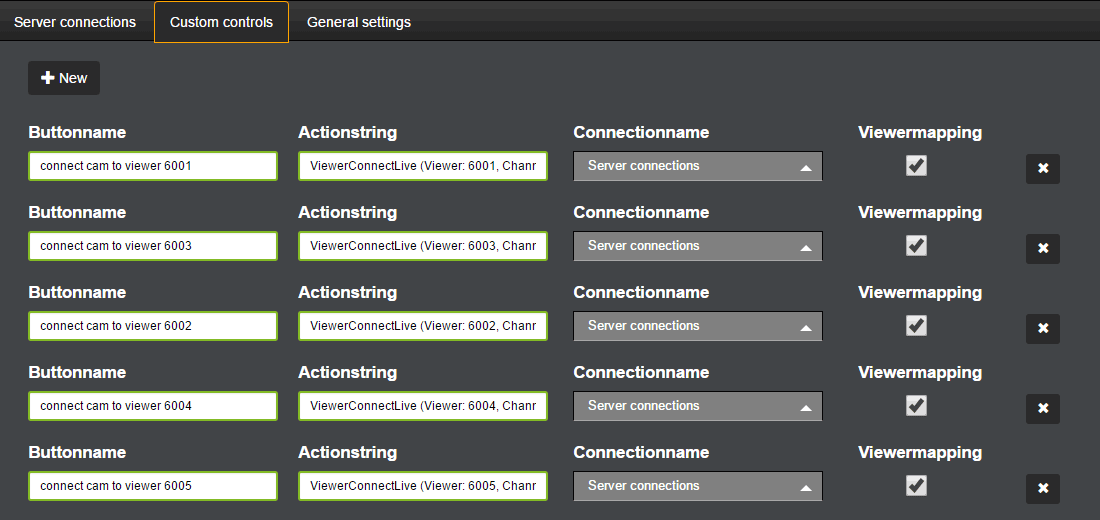
Creating Custom Buttons
In the Custom controls tab, similar to the Server connections tab, the New button can be used to create customer buttons. Four parameter fields are provided for each button.

In the first input field a name for the custom button is entered, which then appears in G-Web as key name.

In the second input field, Action String is entered (a guide for finding it can be found here).

With the connection name selection you assigned the button to a previously configured connection. This drop-down menu works dynamically and automatically adapts with any newly added or renamed connection.

The last option is a check box to enable or disable the viewer mapping.

If viewer mapping is disabled, the action of the button is sent to the configured servers globally. If viewer mapping is enabled, the drop-down menu of the connection name is disabled. In this case, the action of the button is sent to the camera selected in G-Web.
Saving and Resetting
By saving the button, the configured connections and customer buttons are sent to the G-Web service, which is saved in the Windows Registry under HKEY_LOCAL_MACHINE\SOFTWARE\Geutebrueck\Gng\GCoreWEB.
|
If sending the parameters to the G-Web service is successful, a green disc icon is displayed. |
|
|
If an error occurs, a red disk icon will appear. |
|


Clicking Reset sets everything back to the last saved configuration. Here all changes that differ from the parameters saved in the Windows Registry are removed.
Changing the Order of Custom Buttons
The sequence of custom buttons in G-Web can be changed by changing the position of the parameter sets.
To change the position of a custom button, a drag/drop icon must be selected by a continuous left click. The icon appears in front of the button name when you hover the mouse over the parameter set.
If you drag this icon, the entry of the custom button is removed from the list and you can be moved to a new position. This new position is indicated during the process by a gray placeholder.
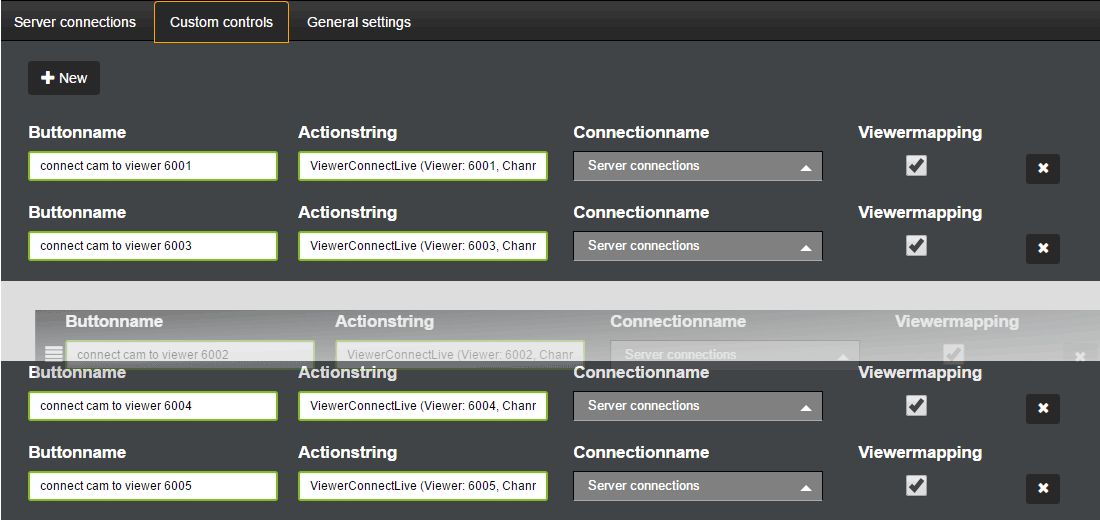
Once the desired position is selected, release the left mouse button. The entry of the custom button is entered at the position marked by the placeholder.
After saving the customized list, the order of custom buttons in G-Web is automatically updated.
Creating an Action String
To create an action string that you can enter in G-Web/Setup for a custom button, you open the PLC Simulator and click Dialog (on the right side in the PLC simulator). The action strings generated work both for G-Scope servers as well as for GeViScope/re_porter servers.
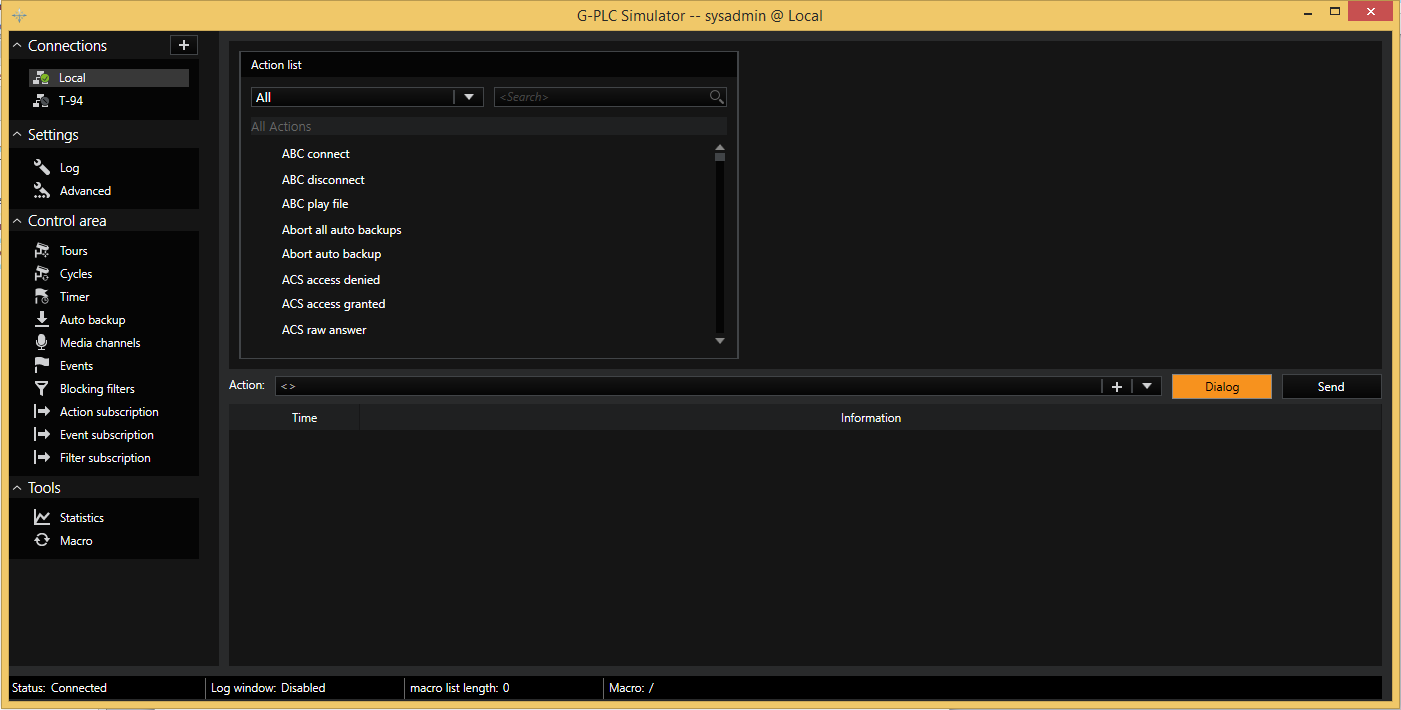
In the upper section of the PLC simulator, an action can now be selected.
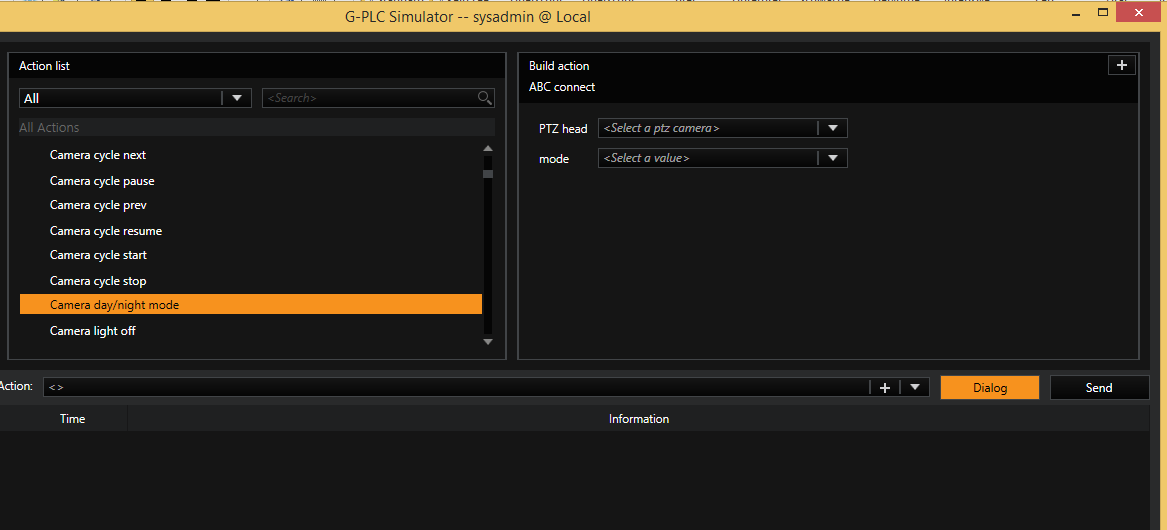
For each action, on the right side a configuration menu ![]() opens, which can be used to add additional parameters to the action.
opens, which can be used to add additional parameters to the action.
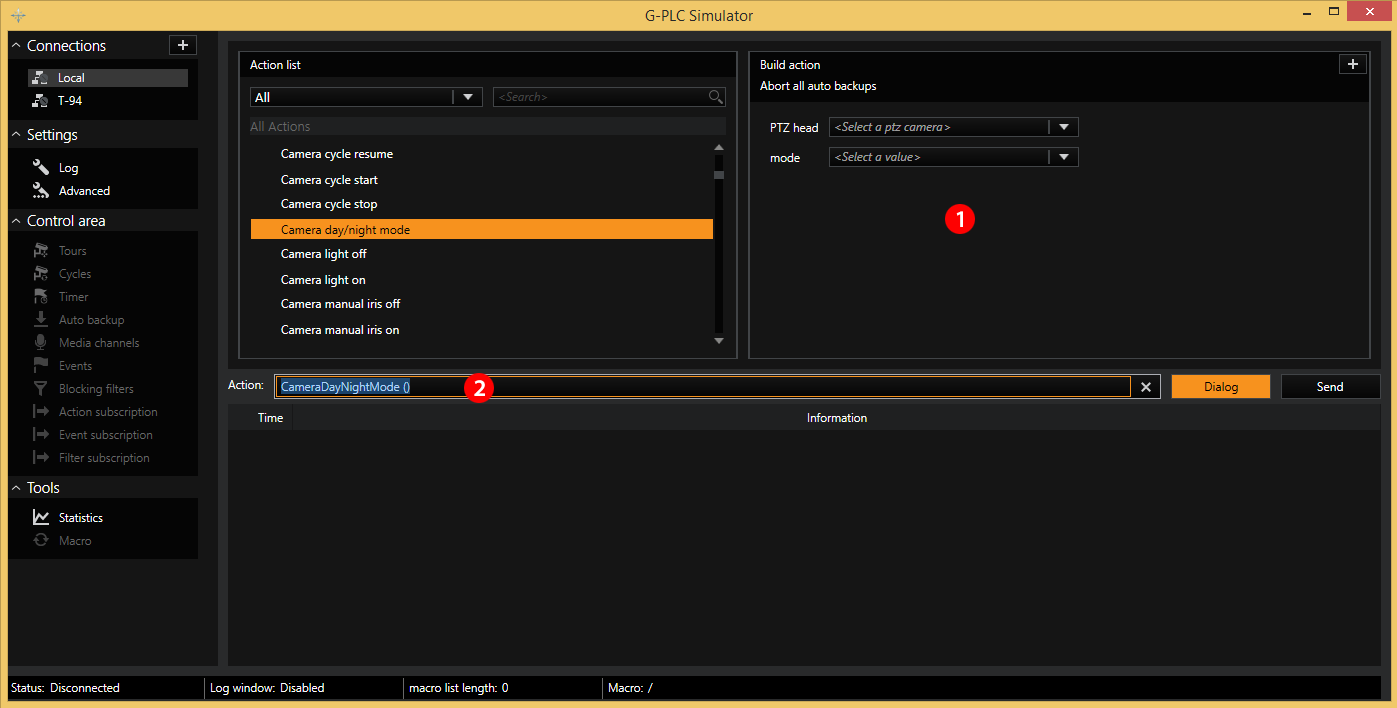
By double-clicking in the input field ![]() , the action will be selected and can be copied using the key command Ctrl+C. The string can then be pasted into the input field of the action string in G-Web/Setup using the key combination Ctrl+V.
, the action will be selected and can be copied using the key command Ctrl+C. The string can then be pasted into the input field of the action string in G-Web/Setup using the key combination Ctrl+V.
Here is an example action to trigger the day/night mode of a TopbLine camera:
CameraRAWOutput (Output: "&Action_0=ImageControls.IRFilterMode.SetStringValue&Parameter_0_0=Open")
General Settings
Alarm Notification
Notification of new alarms can be activated here.
This setting applies globally for all G-Web users!
