ScanConnect
Subject to license
The ScanConnect plugin makes it possible to connect serial scanners and external clients.
Each scanner is assigned a serial interface with its parameters and a location. The data is received as BarcodeData, LogBarcodeData or LogBarcodeID actions and can be edited if necessary before it is sent to the server. The edited actions are added as a hash value to make possible accelerated database searches.
The ScanConnect plugin thus takes over the functions of the previous GSupplyChain/Scan module and the TACI plugin.
Requirements
The ScanConnect plugin requires the following binary files (plugins):
-
ScanConnect.dll,
-
ScanConnect.dlg.dll and
-
MediaPluginLoaderNet.dll
Configuration
To use the ScanConnect plugin, the aforementioned binary files must be present in the MediaPlugins directory.
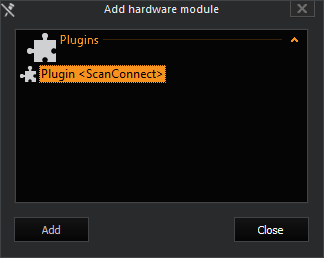
If the server finds the plugin after a restart, it can be added in the server, just like any other plugin:
Once the plugin has been added, in G-Set the ScanConnect interface is added with the tabs
-
Devices
-
Areas
-
TACI (Telnet Action Command Interface)
-
Options
-
Advanced output
-
Import/Export.
Devices
-
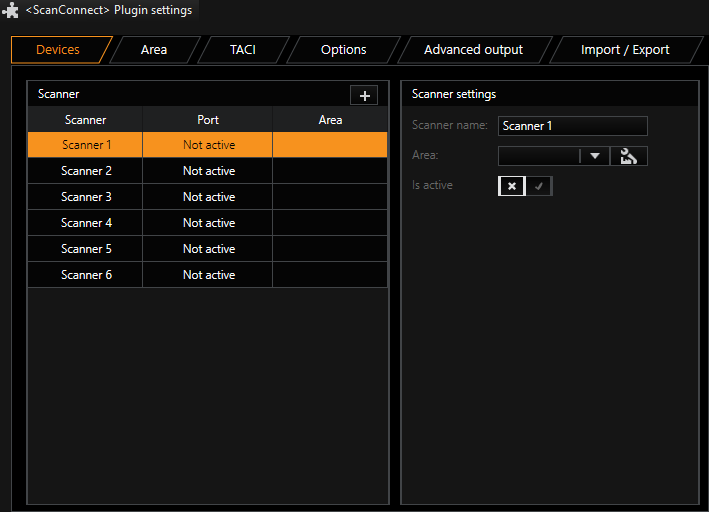
After the plugin has been added, in G-Set the ScanConnect interface should be shown with 6 provided scanners (4x serial and 2 IP). All are initially disabled.
-
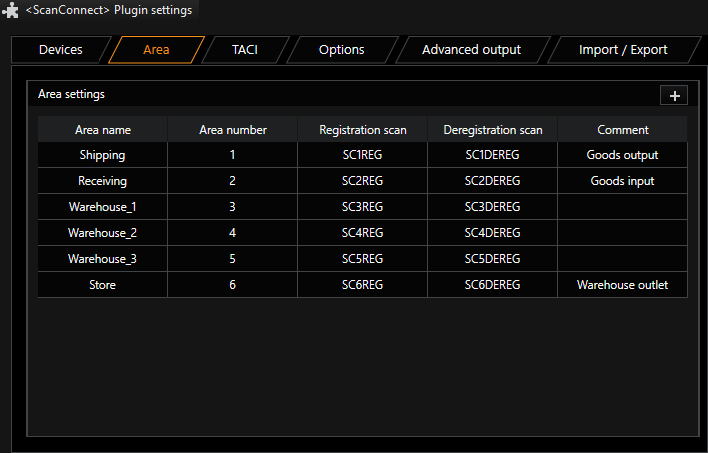
Before the scanner can be configured, all desired areas must be added in the Area tab. To add an area, click Add. In our example, six areas were added:
-
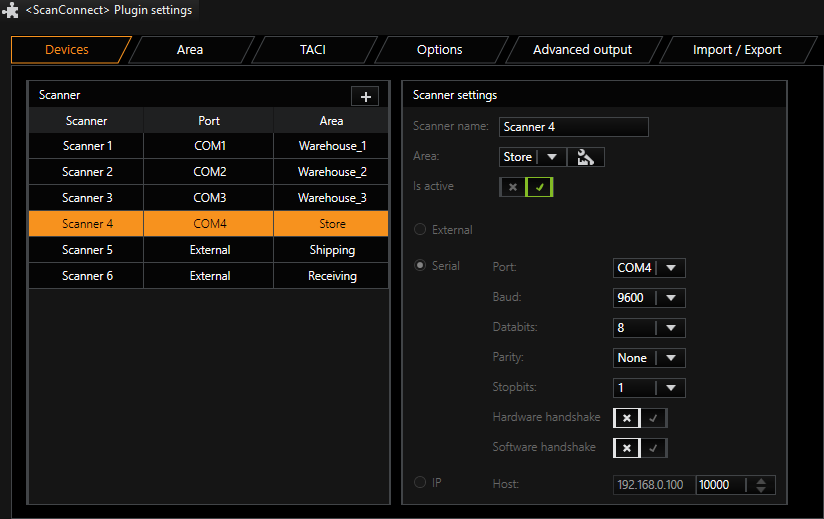
In the Devices tab you can now assign an area to each scanner:
-
Select a scanner and configure it in the Scanner Settings dialog.
-
Click on the
 icon in the Scanner dialog to add additional scanners. A maximum of 255 serial scanners can be added.
This mapping can also be omitted because the scanner can register and deregister itself at other locations using registration and deregistration scan codes at run time.
-
Alternatively, areas and scanners can also be imported from a *.CSV file or exported. These options are found in the Import / Export tab.
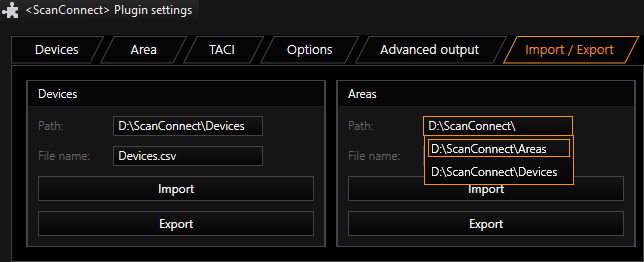
When both a scanner and an area list will be imported, note the following: If the scanners in the scanner list already have area assignments, the area list must be imported first! Otherwise, the area assignments on the scanner list will be lost if the areas indicated in the area list do not yet exist.
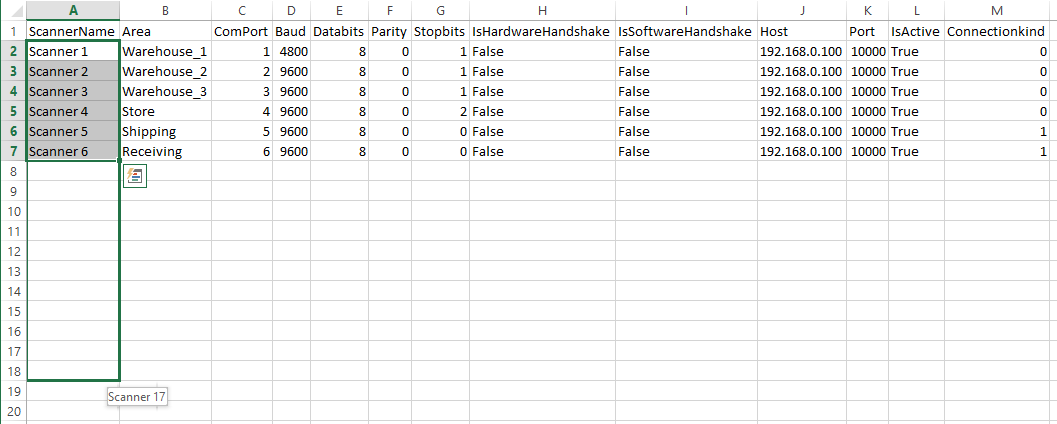
The CSV files can be easily edited using Excel.
-
Managing the scanner list in Excel:
-
Managing the area list in Excel:
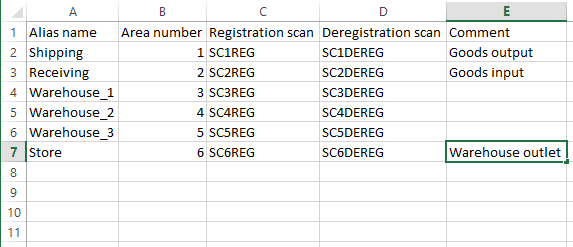
If there are incorrect entries, the entire row will be rejected during the import procedure.
For each Area an Event must be configured to start a recording combined with the scan data. The StartBy LogBarcode. Action must match with the Area Name or AreaID to the event. Supply an Event run time and set Retrigger mode to Start new instance, since the hash for fast research is only written on new events. -
TACI (Telnet Action Command Interface)
All Telnet commands can be easily configured in the TACI tab:
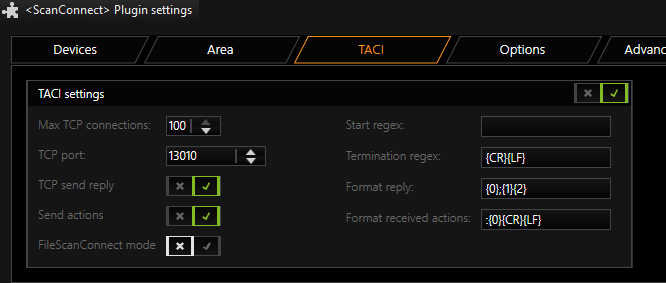
To connect the G-Core FileScanConnect service, switch to FileScanConnect mode
TACI (Telnet Action Command Interface) provides an option for sending and receiving actions in ASCII format. TACI converts these ASCII actions into normal G-Core actions, or conversely converts G-Core actions into ASCII format for transmission over a Telnet port.
The TACI interface included in the ScanConnect Plugin can only receive Barcode Actions (Barcode, LogBarcodeData, LogBarcodeID) . DigitalInput Action can be sent and received to establish a handshake for connection watchdog. If an other action must be sent or received through TACI, the separate TACI-Plugin must be installed.
Your software must be capable of sending and receiving text in ASCII format.
The following describes the parameters:
UDP is not currently implemented.
|
Name |
Description |
|---|---|
|
Is active |
TACI Interface is activated (Default = false) |
|
TCPPort |
Number of TCP Port for the telnet connection |
|
MaxTCPConnections |
Maximum number of allowed TACI connections for one server |
|
TCP send reply |
If set to true you will receive an echo of your command |
|
SendAllActions |
Forward all actions from server to Telnet |
|
Start regex |
Regular expression to identify data start |
|
Termination regex |
Regular expression to identify data termination |
|
Format reply |
Format string of the reply from TACI {0}: Return value 3: Error(No action 4: OK) {1}: Position of echo {2}: Send termination signal at the end (CR/ LF) |
|
Format received actions |
{0} Position of Action in the received string |
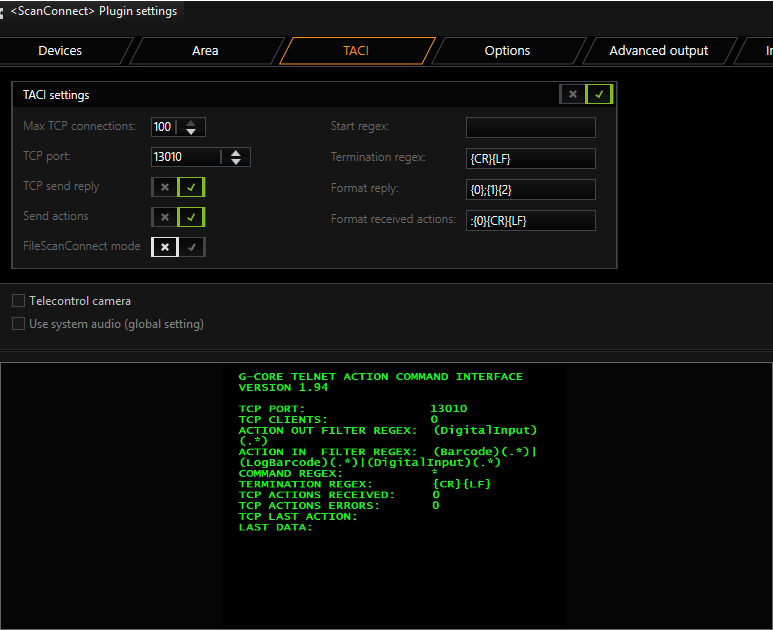
For safety reasons, only the required ports should be open. Port 13010, needed for TACI use, is closed by default by the firewall. However, the firewall typically contains a rule that only needs to be activated to open the port and make it usable for TACI. It is not necessary to create a new rule.
Options
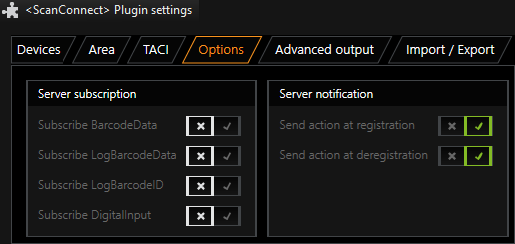
In the Options tab you can specify which Actions will be subscribed from the G-Core server.
You can also specify whether an action will be forwarded if a registration or deregistration scan was performed.
Advanced Output
In the Advanced output tab, scan data formatting can be activated.
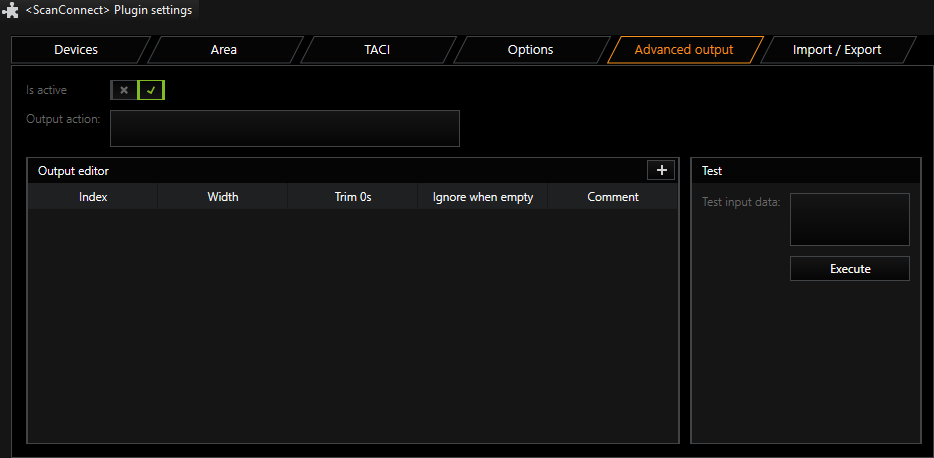
Under Output action the action is entered that is to be sent by ScanConnect when data was processed over the serial interface. Actions are only sent when the Advanced output interface is active (Is active = True).
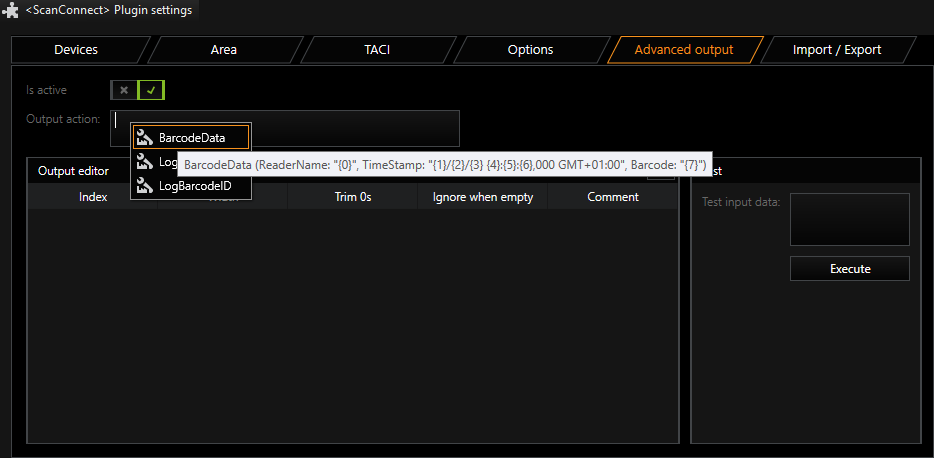
By right clicking in the field Output action, a template for possible actions can be selected: In our example, this is BarCodeData. It displays a help line which adds action/template with a single click.
In the action character string, parameter values are provided with placeholders {0}. The number of these placeholders is found under Index in the Output editor. A new index can be added by clicking the ![]() icon.
icon.
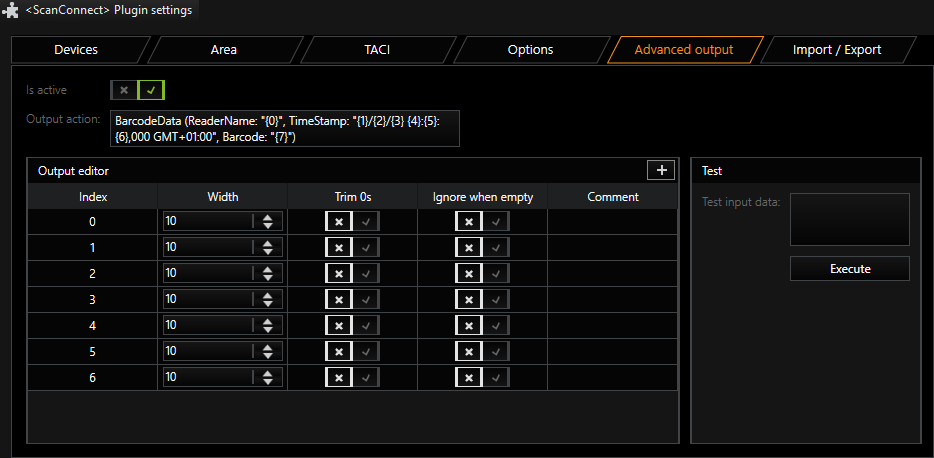
Example In our sample action, seven index entries are required. However, more index fields can be added, for example, to ignore/ skip a portion of the input data.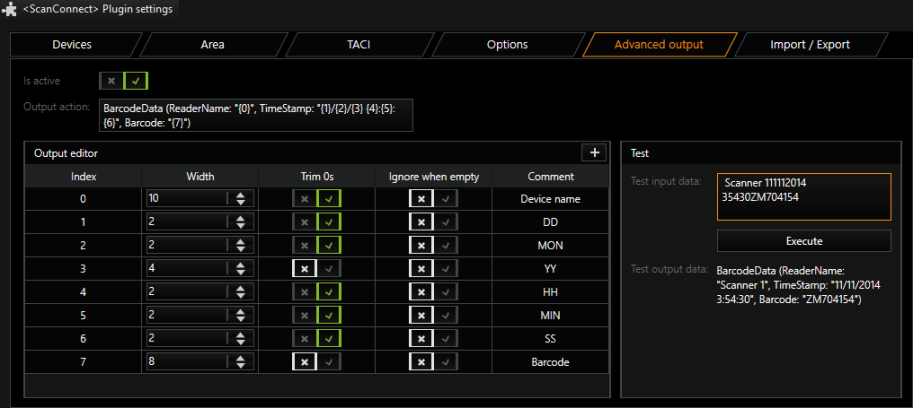
Under Width you set where the corresponding data is located in the input data.
With the activation of Trim0s, leading zeros are cut off in the strings.
If Ignore when empty is activated for an index entry, the target parameter is ignored when the data section is empty.
Spaces at the start and end of the data section are always removed.
Whether the configuration matches the scheme of the future scan data can be checked by clicking Execute in the Test area.
Example Here is another example with more index entries: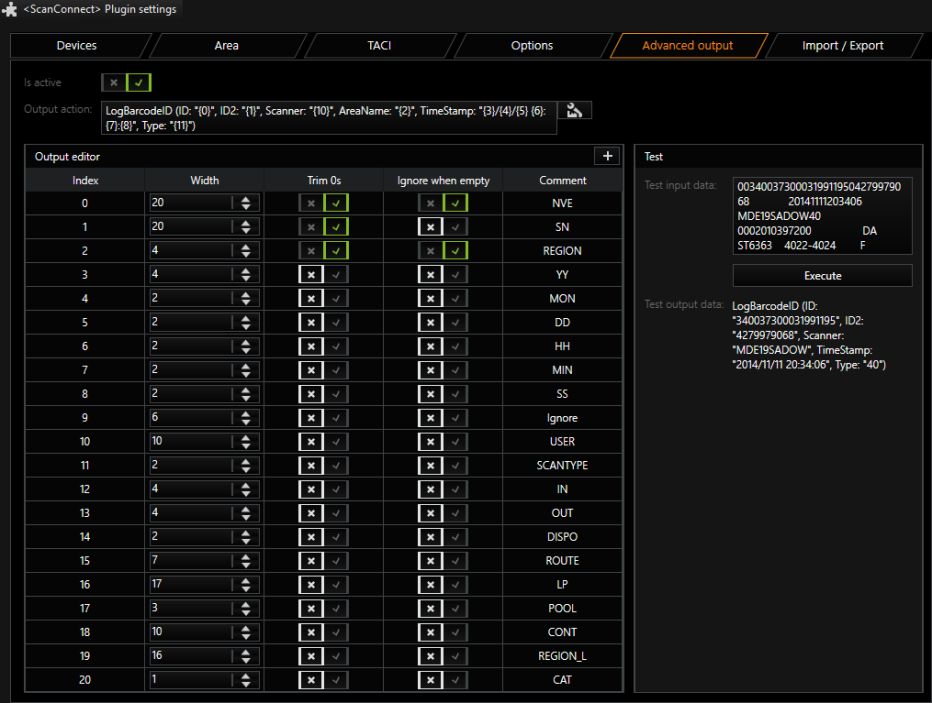
In the field Output action is the action that will be sent by the ScanConnect plugin. In this case, LogBarcodeID with 11 necessary and 9 other commented parameters. In the above example, the scanner ID (NVE) is truncated to 20 characters. The rest of the string is shown in ID2 (Width) and for the first three strings, by activating Trim0s, the leading zeros are cut off. In the Test area you can see the output data for the LogBarcodeID-String as input and output.
Creating Additional Profiles:
It is possible that the input data have different lengths. In this case, an additional profile can be created (click on the ![]() icon).
icon).
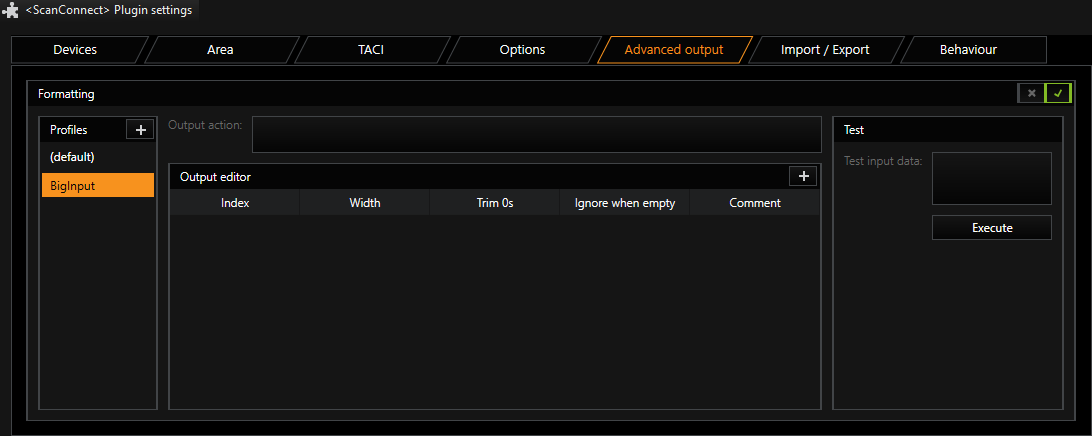
The new profile can now be adapted to a 20-digit bar code or a 34-digit character string (here the input data).
If additional profiles are created, they can be assigned to the scanners. The default profile then applies for all other scanners.
